Category: Guides

  • Is Sending Money to India Through Apps Safe? Security Guide for NRIs

    Is Sending Money to India Through Apps Safe? Security Guide for NRIs

    Trusting an app with thousands of dollars feels risky. Horror stories of frozen accounts, lost transfers, and scams make headlines. But modern remittance apps are often safer than traditional methods when you know what to look for. This guide helps you evaluate any money transfer service and protect yourself from fraud.

    What Makes a Money Transfer Service Legitimate

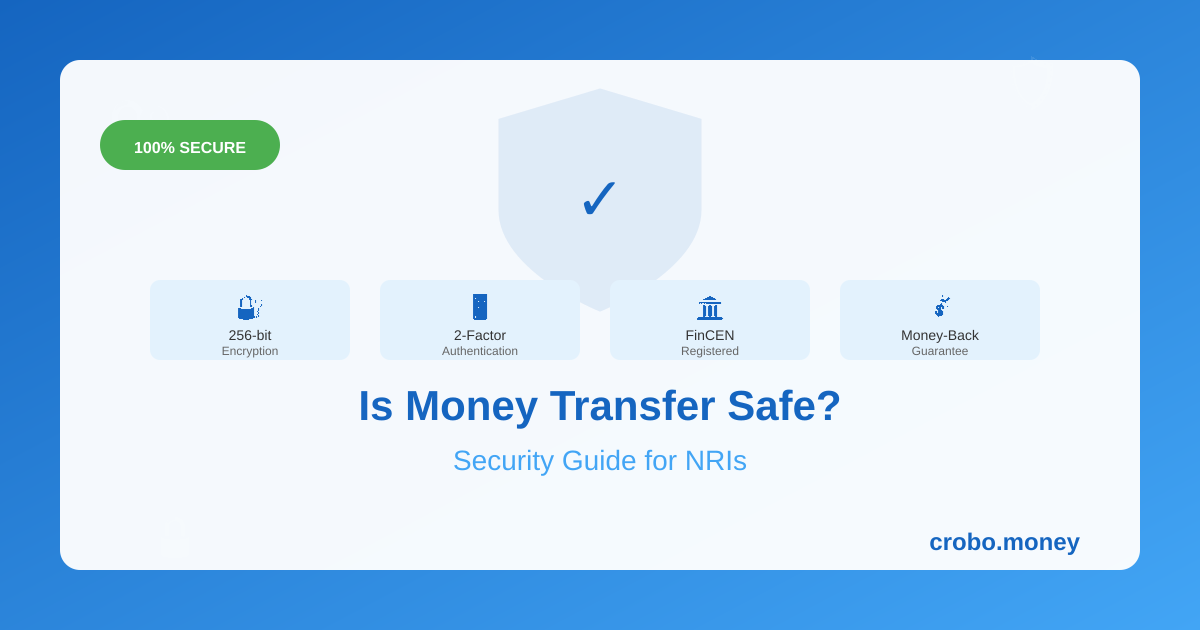
    Every legitimate money transfer service operating in the US must be registered with FinCEN (Financial Crimes Enforcement Network) as a Money Services Business (MSB). You can verify this at FinCEN’s website. State licenses are required in most states for money transmission and these are publicly searchable. Partnerships with regulated banks for fund handling and regular audits for financial and security compliance round out the requirements. Crobo, for example, is FinCEN registered and partners with banking institutions regulated by both US and Indian authorities.

    Security Features to Look For

    A secure service should offer bank-level 256-bit encryption for all data transmission. Two-factor authentication (2FA) for account access is essential. Biometric login options like Face ID and fingerprint add convenience and security. Transaction monitoring for fraud detection catches suspicious activity. Device recognition to flag unusual login locations and instant notifications for all account activity round out robust security.

    Red Flags That Signal a Scam

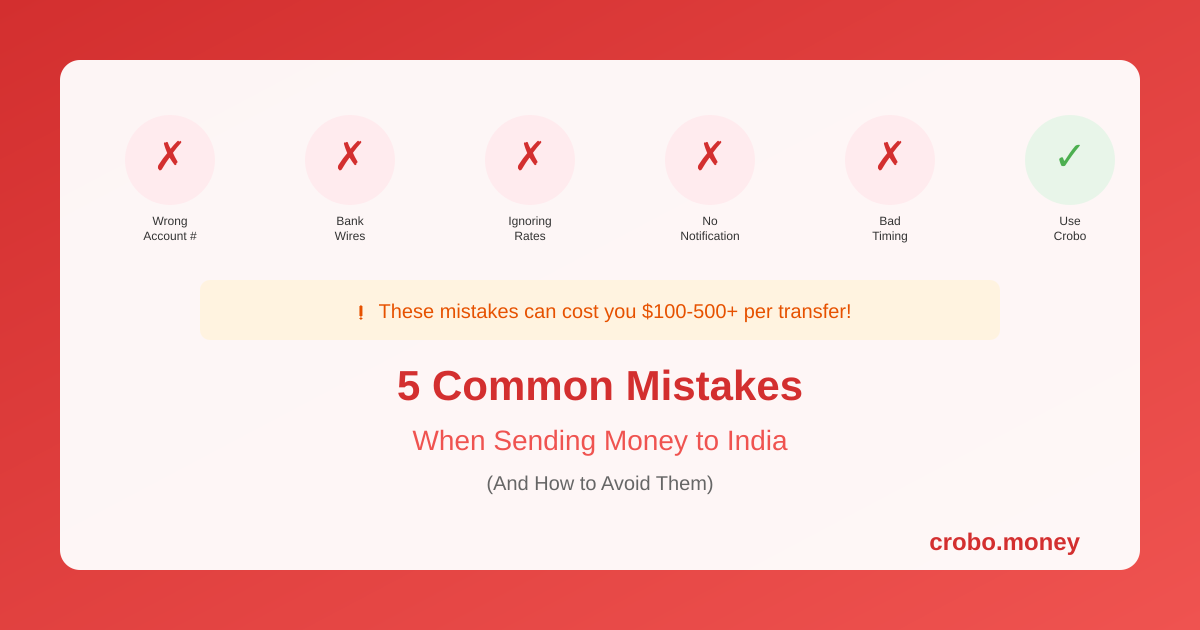
    Be wary of rates that seem “too good to be true” since scammers lure victims with impossible rates. Pressure to send money immediately is a classic scam tactic. Requests for payment via gift cards, cryptocurrency, or wire to individuals are huge warning signs. No verifiable company address or customer service should make you walk away. Unsolicited contact claiming you’ve “won” something is always a scam. Requests to share your login credentials with anyone is never legitimate.

    Understanding Money Protection

    Legitimate services protect your funds in several ways. Segregated accounts keep customer funds separate from company operating funds. FDIC-insured partner banks mean your funds are insured during processing up to limits. Guaranteed delivery policies mean money back if the transfer fails. Clear refund and cancellation policies should be prominently displayed. Ask your service provider how your money is protected during the transfer process.

    What Happens If Something Goes Wrong

    Reputable services have clear dispute resolution processes. For delayed transfers, you should receive proactive communication and updates. For failed transfers, automatic refunds within a specified timeframe are standard. For incorrect transfers, assistance recovering funds or correcting errors is expected. Crobo offers a money-back guarantee and 24/7 support for any transfer issues.

    Protecting Yourself from Fraud

    Even with a secure service, you must stay vigilant. Use unique, strong passwords for your money transfer accounts. Enable all available security features like 2FA. Only download apps from official app stores. Never click links in unexpected emails claiming to be from your transfer service. Verify recipient details through a separate channel such as a phone call before large transfers. Monitor your bank statements for unauthorized transactions.

    Why Apps Can Be Safer Than Traditional Methods

    Carrying cash is risky and untraceable if lost. Bank wires pass through multiple intermediaries, each a potential failure point. Check fraud is common and reversible by criminals. Modern apps provide end-to-end encryption, instant tracking, and direct transfers to verified accounts. The digital trail also helps in case of disputes.

  • 5 Common Mistakes When Sending Money to India (And How to Avoid Them)

    5 Common Mistakes When Sending Money to India (And How to Avoid Them)

    A small mistake in your money transfer can cost you hundreds of dollars or delay funds when your family needs them most. After handling millions of transfers, we’ve identified the most common errors NRIs make when sending money to India. Here’s how to avoid each one and ensure your transfers go smoothly every time.

    Mistake #1: Wrong Account Number or IFSC Code

    This is the most common and potentially costly error. Typing a wrong digit can send money to a stranger’s account or cause the transfer to fail. Always have your recipient confirm their account number from their bank passbook or online banking, not from memory. Verify the IFSC code matches their exact branch since banks with multiple branches in a city have different codes. Double-check before submitting because most services show a confirmation screen. For regular recipients, save their details after the first successful transfer.

    Mistake #2: Using Bank Wire Transfers for Small Amounts

    Bank wires typically cost $45-50 per transfer plus poor exchange rates. For a $500 transfer, you might lose 15-20% to fees and rates. The fix is simple: use online remittance services for amounts under $10,000. Services like Crobo charge zero fees on ACH transfers and offer near mid-market rates. Reserve bank wires only for very large amounts where specialized service may be needed.

    Mistake #3: Ignoring Exchange Rate Differences

    Two services might both advertise “low fees” but offer vastly different exchange rates. A 2% rate difference on $5,000 means ₹8,400 lost. The solution is to always compare the final INR amount received, not just the fees. Check the current Google rate as your benchmark. Use comparison tools or calculate manually to ensure you’re getting the best deal. What you pay includes both visible fees and the exchange rate spread.

    Mistake #4: Not Informing Your Recipient

    Unexpected deposits can cause confusion or even rejection. Your recipient might not check their account for days or mistake the deposit for something else. For large amounts, banks may hold funds pending verification. Always tell your recipient the expected amount in INR, the approximate arrival date, the sender name as it will appear, and how to contact you if there’s an issue. A quick WhatsApp message can prevent unnecessary worry.

    Mistake #5: Transferring During Rate Fluctuations Without Awareness

    Sending money right after major economic announcements can mean poor rates. US Fed rate decisions, India RBI policy updates, and global market volatility all impact USD/INR. While you can’t time the market perfectly, you can avoid known volatility periods for non-urgent transfers. Set up rate alerts to be notified of favorable movements. For large amounts, consider splitting across multiple transfers to average out rate fluctuations.

    Bonus Mistake: Using the Wrong Account Type

    Sending US income to an NRO account instead of NRE creates tax complications and repatriation limits. Ensure you’re sending to NRE for foreign-earned income. NRO should only receive India-sourced income like rent or dividends. If you’ve made this mistake, consult a CA in India about correcting the record.

    A Pre-Transfer Checklist

    Before every transfer, confirm these items. Is the account number correct with all digits verified? Is the IFSC code for the right branch? Does the recipient name match exactly with the bank account? Am I getting a competitive exchange rate compared to Google? Have I informed my recipient about the incoming transfer? Is this going to the correct account type, NRE or NRO?

  • How to Send Money to India from USA: Step-by-Step Guide for First-Time Users

    How to Send Money to India from USA: Step-by-Step Guide for First-Time Users

    Sending your first international transfer can feel daunting. What documents do you need? How long will it take? Is your money safe? This step-by-step guide walks you through everything, from choosing a transfer method to ensuring your recipient receives the funds smoothly. By the end, you’ll transfer money to India with confidence.

    Step 1: Choose Your Transfer Method

    You have several options for sending money to India. Online remittance services like Crobo, Wise, and Remitly offer the best combination of speed, cost, and convenience for most people. Bank wire transfers are expensive and slow but may be required for very large amounts. Mobile apps from Indian banks like ICICI’s Money2India work if you already have accounts with them. Cash transfer services like Western Union are useful for unbanked recipients but charge premium fees.

    Step 2: Gather Required Information

    Before starting, collect your recipient’s bank account number, IFSC code (11-character code identifying the bank branch), full name exactly as it appears on their bank account, phone number for transfer notifications, and address for compliance purposes. For the sender, you’ll need US government ID such as a passport, driver’s license, or state ID, a Social Security Number or ITIN, proof of address, and your bank account or debit card details.

    Step 3: Create Your Account

    Using Crobo as an example, the process is straightforward. Download the Crobo app from the App Store or Google Play. Enter your email and create a password. Verify your identity by uploading a photo of your ID. Enter your SSN for regulatory compliance. Complete address verification. This one-time setup typically takes 5-10 minutes. Some services may require additional verification for larger transfers.

    Step 4: Add Your Recipient

    Enter your recipient’s details carefully since mistakes cause delays. Double-check the account number by having your recipient confirm from their bank statement or passbook. Verify the IFSC code matches their branch. Ensure the name matches their bank account exactly since “Raj Sharma” and “Rajesh Sharma” will cause problems. Save the recipient for future transfers.

    Step 5: Enter Transfer Amount and Review

    Enter the amount you want to send in USD. Review the exchange rate being offered and compare to the Google rate. Check the total fees applied. Confirm the amount your recipient will receive in INR. Look for any promotional offers for first-time users. Take a screenshot of this summary for your records.

    Step 6: Fund Your Transfer

    Select your payment method. ACH bank transfer is usually free but takes 2-4 business days to process. Debit cards process instantly but may have a small fee. Credit cards work but often have cash advance fees from your card issuer. Wire transfers are fastest but most expensive. For your first transfer, ACH is recommended to verify everything works smoothly.

    Step 7: Track and Confirm

    After submitting, you’ll receive a confirmation email with a reference number. Track your transfer status in the app since most services show stages like processing, in transit, and delivered. Your recipient should receive an SMS or email notification when funds are deposited. Have them confirm receipt and check the amount. Save all confirmation details for your records.

    Tips for a Smooth First Transfer

    Start with a smaller amount to test the process before sending larger sums. Inform your recipient to expect the transfer to avoid them missing notifications. Avoid weekends and Indian bank holidays for fastest processing. Keep your phone accessible for any verification codes. Save the customer support number in case of issues.

    What If Something Goes Wrong?

    If your transfer is delayed, first check the app for status updates. Contact customer support with your reference number. Common issues include bank holidays causing delays, incorrect recipient details requiring correction, and verification holds for first-time or large transfers. Reputable services like Crobo have guarantees where your money is refunded if the transfer fails.